
Last Updated on March 24, 2026
Learn How to Create a RAID 1 Mirrored Drive Set
RAID (Redundant Array of Independent Disks) is used for drive and data redundancy as well as drive performance. There are many levels of RAID each with their own benefits and downsides. RAID can be setup with hardware such as a RAID controller installed inside your computer or with software such as what Windows allows you to do. In this article we will be talking about RAID 1 which is called disk mirroring and show you how to set it up using the built in Windows RAID software configuration.
RAID 1 uses 2 disks that are identical in capacity and duplicates the data on each disk so if one of the disks fails the other can take over and your data will be safe. If both disks fail then you will lose your data and have to restore from backup assuming you have one. When 1 disk fails you can install a new disk and the mirror will rebuild itself and start functioning like normal again.

Once you have your 2 identical disks installed inside your computer you would go to Disk Management and it will ask you to import your disks if you haven’t done so already. Once they are there they will be setup as Basic disks with no volumes on them. In order to make a mirrored disk set out of them you will need to convert them to Dynamic disks. To do so right click on each one (in the grey section) and choose Convert to Dynamic Disk. Or you can just wait and have it done for you when configuring the RAID1 set. Also make sure you don’t create any volumes on the disk and leave them as Unallocated.
So what if you want to make separate drive for organizational or testing purposes etc. but have already installed Windows on your existing drive and have it partitioned the way you want it? If that’s the case then you can create a virtual disk using the existing space on your hard drive. A virtual disk will act as a standalone disk that you can format and assign a drive letter to just like you added another physical disk in your computer but will actually use the disk space on your current hard drive. This comes in handy for experimenting with virtual machines and other virtualization testing.
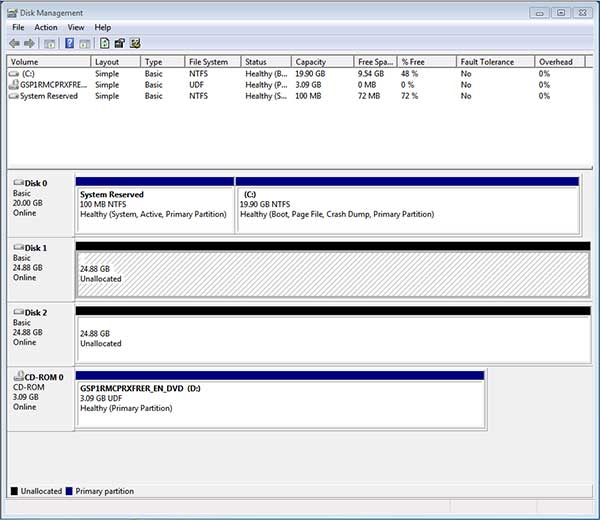
In order to create a virtual drive you will need to go into Disk Management which you can find by right clicking Computer and choosing Manage or by typing diskmgmt.msc in the run box. When Disk Management opens up it will show all the drives attached to your computer including your CDDVD drive and any USB drives you have connected. Our example will look different from what you see on your computer.
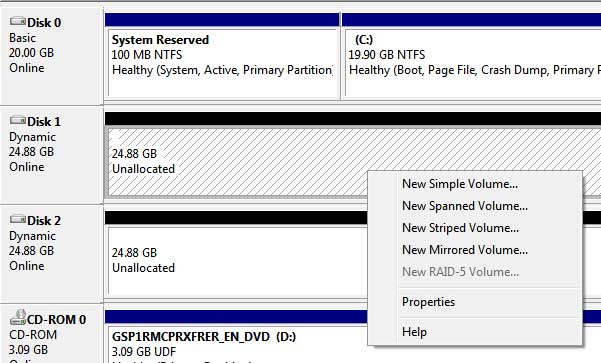
Now to setup the mirror simply right click on the Unallocated space on one of the drives and choose New Mirrored Volume.
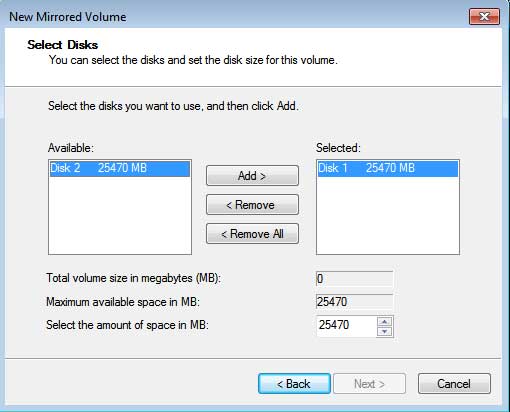
Then the New Mirrored Volume Wizard will start and after clicking Next you will select your disks to make the mirror. The one you right clicked on will already be selected and then you just need to add the second disk from the Available disks section by highlighting it and clicking on Add.
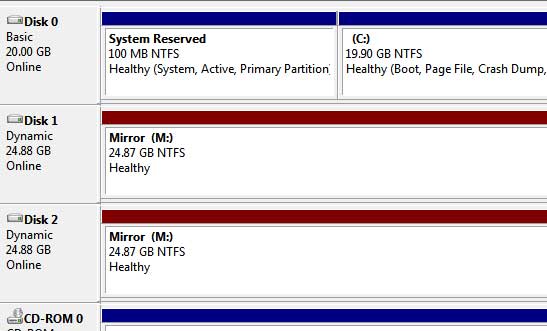
Then you choose an available drive letter and give it a volume name and have it format the new volume. After its formatted it will show up as a mirrored drive in Disk Management yet still show the 2 separate drives but they will both have the same drive letter and show the identical capacity.
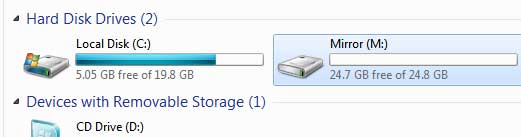
But if you look at the drive in Windows File Explorer it will show as one drive with the capacity of one of the disks because it only uses half the capacity of both disks combined since they are duplicates of each other.
Now you can save data to your new drive and it will be written to both drives offering redundancy in case one of the drive fails. Keep in mind that if you are doing this on virtual disks created from the same physical hard drive it won’t help you because if the physical drive fails, both virtual drives will fail as well.
For additional training resources, check out our online IT training courses.
Check out our extensive IT book series.


