Last Updated on March 27, 2026
Excel is a spreadsheet application from Microsoft and is the most popular of its type in use today. A spreadsheet is used for capturing, displaying, and manipulating data arranged in rows and columns. Spreadsheets can be used for record keeping, performing calculations of data, charting or graphing data and many other uses. Some people even use them to make chore or grocery lists! This tutorial will be based on Excel 2003 and should apply to newer versions.
Before staring your spreadsheet it’s a good idea to figure out how you are going to lay out your information. You don’t want to enter in your data and then realize you want it displayed differently and have to do it over again. The information will be laid out in an X and Y axis format using rows and columns. You can have header/title information along the top row if you would like to define the data in the columns.
Excel has many of the toolbar items and menus as other programs such as Microsoft Word such as File, Edit, and View etc. Many of the submenus are the same as well.

An Excel spreadsheet consists of rows and columns of cells. Cells are what contain the information you are going to be using. You can enter data such as dates, time, numbers, text and so on. To enter data simply click on the cell you want to input the data into and start typing. To go to the next cell you can use a variety of methods. You can use the mouse to click on the next cell, press Enter to do down, Tab to go across or use the arrow keys to move around any direction.
If you need to add more worksheets to your file you can click on the Insert menu and then on Worksheets. If you want to rename your worksheet double click on the worksheet name tab on the bottom of the sheet and type in a new name. You can also drag the worksheets around if you want to change the order that they appear in the file.
Formatting Data
Once you enter data you can format it or delete it if you don’t want it there any more. Just click on the cell or cells you want to change to highlight them and you can format them just like a Word document by making them bold, underlined, centered, a different color and so on. To highlight multiple cells you can use the standard Shift and Ctrl methods that Windows uses for selecting multiple items. You can also click on the grey row or column number itself to highlight the whole row or column.
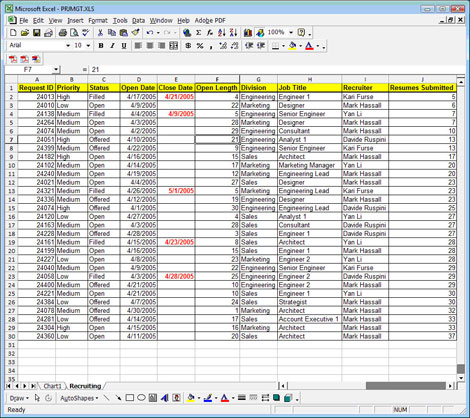
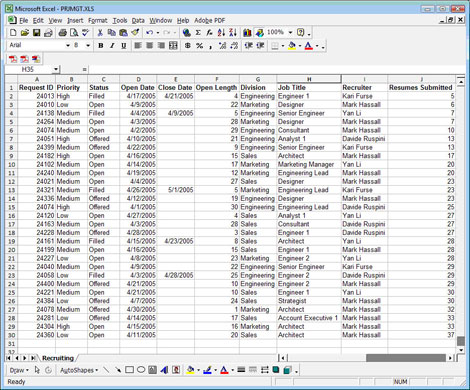
Here you can see a typical spreadsheet with various data filled in the cells. As you can see the data is categorized at the top of each column making it easier to understand what information is in the spreadsheet. This sample has text, numbers and dates for Information.

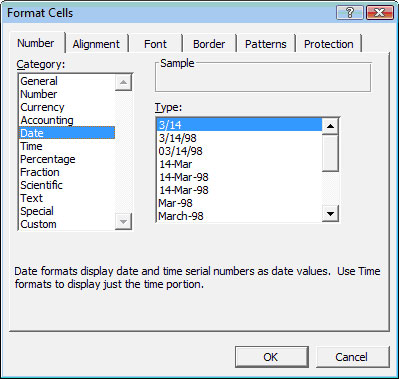
You can do special formatting of the cells depending on what type of data you have in the cells. For example for the date column you can have the date displayed in a variety of formats. To format a cell or group of cells simply highlight the cells then click on the Format menu then click on Cells. Then pick the type of formatting you want to use from the Category list and then select how you want the data displayed from the Type list.
From this section you can also change other formatting such as the font, cell borders and lock or hide the cells under the Protection tab.
Excel allows you to insert and delete rows and columns in your spreadsheet as needed. To insert a row or column right click on the row number or column letter that you want to insert next to and select Insert from the menu. To delete a row or column right click on the row number or column letter that you want to delete and select Delete.
To make your data easier to read you can add borders and color fills to your cells so they stand out better. To add borders highlight the cells you want to add borders to and click on the Borders toolbar button to select what type of border you want to use. To add a fill highlight the cells you want to fill and click on the Fill Color button to select a color for your fill.
Sorting Data
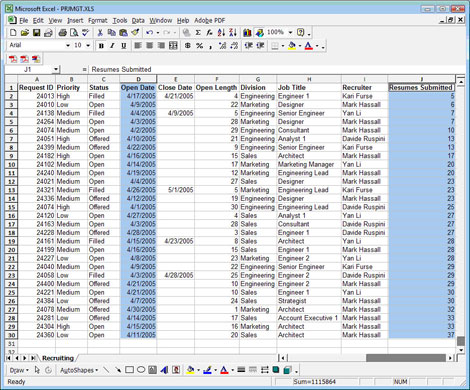
If you need to change the order of your data or the way that it is displayed then you can do what is called a sort. Sorting Data allows you to group the information in different order to make it easier to read. For example you can sort by number high to low or low to high or sort alphabetically from A to Z or Z to A and so on. As you can see in our example the Resumes Submitted column has been sorted numerically from lowest number to highest. Notice how all of the other data has changed as well to follow the new order. We want to keep the other columns in line with the Resumes Submitted column so the data doesn’t get mixed up.
To sort your data highlight all of the columns with data that needs to be kept together in order and click on the Data menu and then pick Sort.
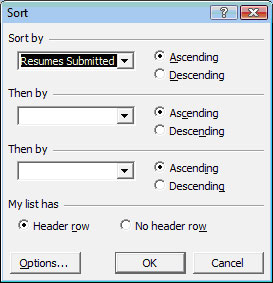
Then click on the drop down box under Sort by to select which column you want to sort by. You can select 2 other columns to sort by as a secondary sort.
Charting Data
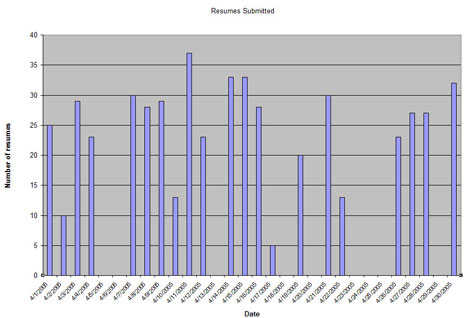
Excel allows you to make charts and graphs representing your data to make it easier to understand. To make a chart simply highlight the data you want included in the chart and click on the Insert menu and then on Chart.
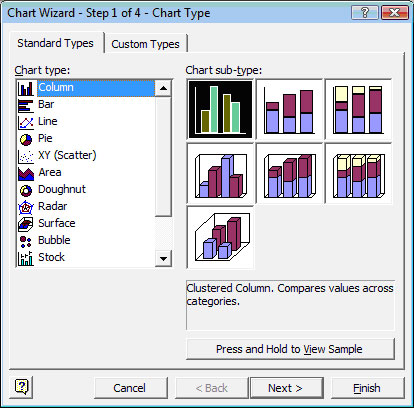
From the Chart Wizard you can select what type of chart you want to use to display your data and go through the steps to make the chart. Then you can choose to have it displayed on the same worksheet as your data or in a worksheet by itself.
Saving and Printing Your Spreadsheet
After you have finished entering your data and formatting your spreadsheet you may want to save it for use later or print it out for various reasons.
To save your spreadsheet simply click on the save icon or click on File menu and then on Save. Choose a name for your file and location where you want to save the file and click the Save button.
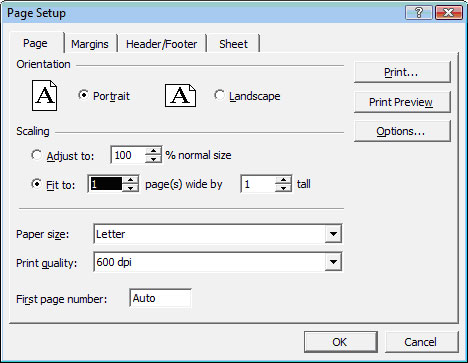
Before you print your spreadsheet you may want to check out the print preview to see how it will print before getting any unwanted surprises. Click on the File menu and the on Print Preview. If anything looks off or is not fitting on the page properly then you can make adjustments before printing. One option you may end up using is under the File menu and then Page Setup. Here you can have your whole worksheet forced to fit on one page so it doesn’t run over onto other pages.