If you are like many people you do not make it a point to do regular backups of your files or your computer itself. It may be a case of it being something you don’t think about doing, don’t know how to do or don’t really care to do! But when your computer crashes or you delete a file on accident I’ll bet you wished you had a backup to resort to rather than that awful feeling of losing something important.
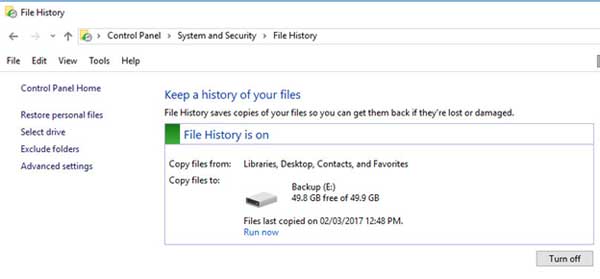
Windows 10 has some great improvements over older versions of Windows and they have included more backup and recovery features to keep your computer up and running and your files safe. One of these features is called File History and it makes periodic backups of your important files to another location on a schedule that you choose. File History is pretty easy to setup and use and all you need is some type of secondary backup location such as a flash drive, USB hard drive, network drive or secondary attached hard drive. To open File History navigate to Control Panel, System and Security and then File History.
Once there you will need to turn on File History if it’s not already from the button on the lower right.
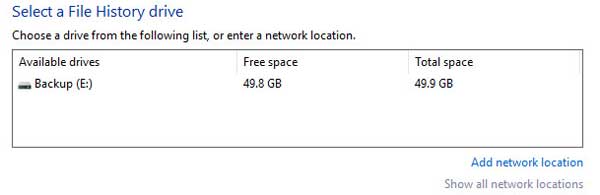
Next you will want to click on Select drive to choose your backup location. Once you are there it will show any devices it has found that can be used for backup or you can add a network location if you have one available for usage.
If you want to fine tune the settings you can do so from the Advanced settings section. From here you can configure how often files are saved and how long to keep the saved versions. Clicking on Event logs will allow you to see how the file saving procedure has been working.

If there are certain files or folder you do not want copied then you can add them to the exclusion list from the Exclude folders section.
After you have everything configured and enabled File History will do its thing based on the schedule you have setup. You can also click on Run now from the main section to have the copy process take place right away.
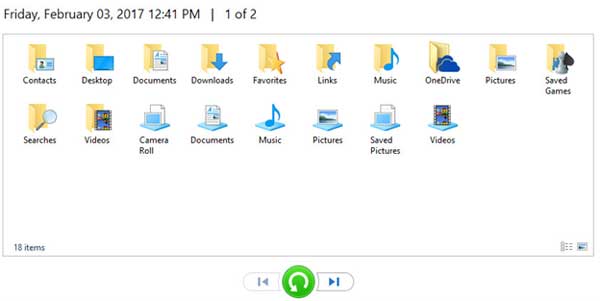
To restore files you will go to the Restore personal files section and you will see a listing of your files and the date and time that they were saved to your backup location. Clicking the next arrow button will allow you to see the next version of your copied files. Clicking on the green restore button will restore the file to its original location and if you already have a copy of that file there it will ask you if you want to replace the file or skip the file. You can also have it compare the 2 files and decide which version you want to keep.
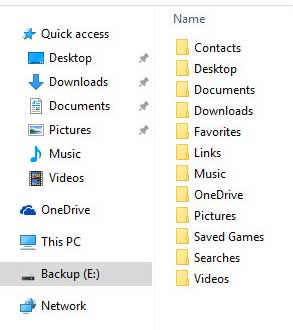
You can also browse to your backup location to see your backed up files and then restore them manually if needed. You will notice that File History will put dates on the end of the file names so you will know when it was saved.