Last Updated on February 26, 2026
Create your own custom screensaver photo slideshow in Windows
Ever since the people started using Microsoft Windows there has been a fascination with using a screensaver to customize your computer and give others something to look at while you are away from your desk. Back in the old days you were stuck with just the built in screensavers or installing some third party screensaver software you managed to find.
Then as Windows progressed screensavers became more customizable and no you were able to use your own pictures as your screensaver just like you could for your background. Eventually you were able to create a screensaver slideshow so that way it would cycle through all of your pictures to make your screensaver a little more exciting to look at.

When Windows 10 came along they changed the way you configure the screensaver slideshow and it takes another step or two to get to the settings but it’s still very easy to setup and customize.
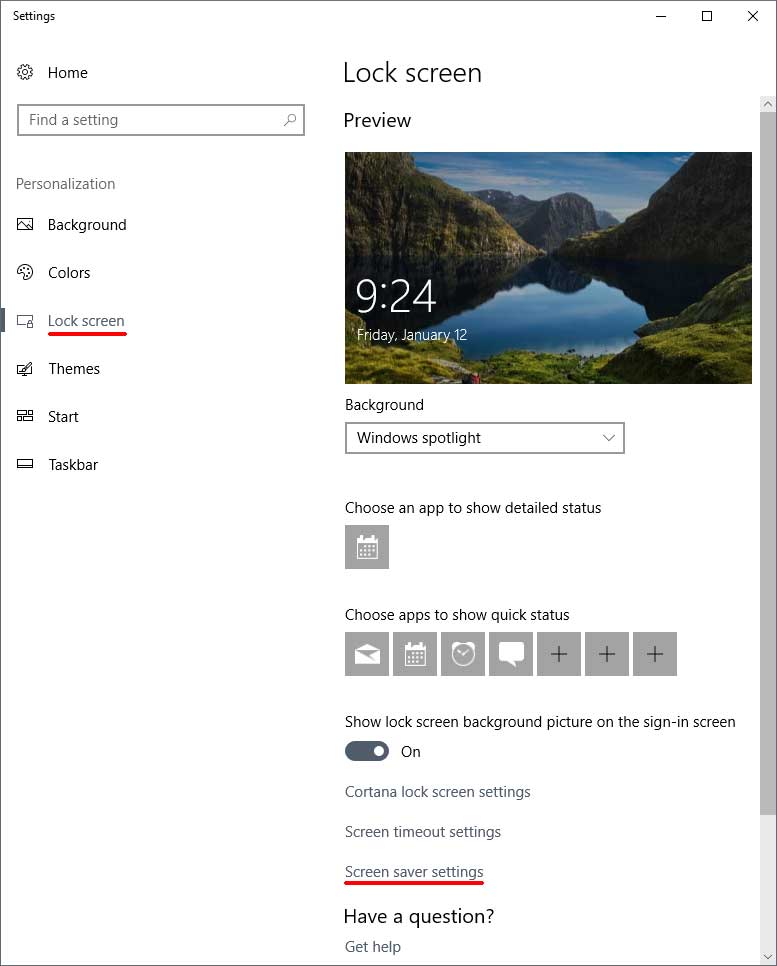
The first thing you need to do is get to your personalization settings and this can be done by right clicking a blank spot on your desktop and choosing Personalize or going to your Windows 10 settings and finding the Personalization section. From there you want to click on Lock screen on the left which is not too intuitive but that’s how you do it. From there click on Screen saver settings near the bottom and you will then get to a familiar looking interface.
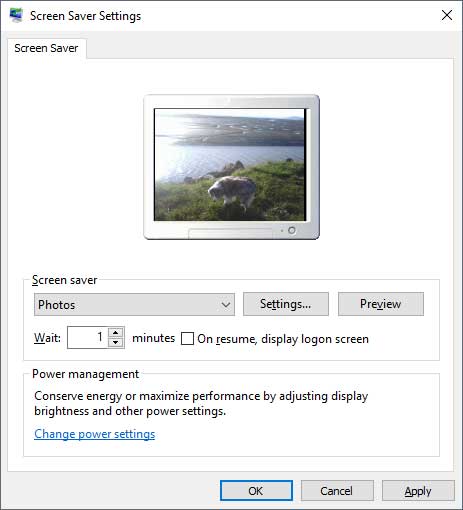
Once you are here change the Screen saver dropdown type to Photos and choose when you want the screensaver to kick in. Keep in mind the setting is for X amount of minutes of you not touching the mouse or keyboard. You can also check the box that says On resume, display the logon screen if you would like to make it where you put in your password when you get back to your computer. This comes in handy if you want to leave your computer on and not have to worry about others getting on to it. Just keep in mind that it will be accessible until the screensaver kicks in once you walk away so you may want to set the time low if you are looking to make things more secure.
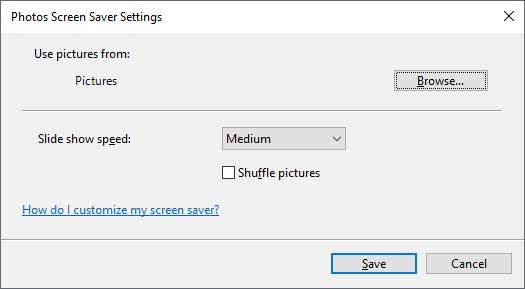
To customize the pictures that are used in your screensaver slideshow click on the Settings button. Then browse to the folder that contains the pictures you want to use. One thing to note is that it will use all of the pictures in that folder so make sure they are ones that you don’t mind other people seeing. It defaults to your Pictures folder but you can make a new folder, copy the pictures you want to use to it and then browse to that new folder to have Windows only use the pictures you prefer.
Then you can choose the slideshow speed and your choices are slow, medium and fast with slow being around 10 seconds, medium around 5 seconds and fast being around 3 seconds between pictures. If you check the Shuffle pictures box then the pictures will be shown in a random order rather than the same order each time.
Once you choose the folder that your pictures are in and set your speed and shuffle options simply click on Save and then Ok on the previous screen and you will be all ready to go with your screensaver slideshow.
For additional training resources, check out our online IT training courses.
Check out our extensive IT book series.