Last Updated on April 28, 2026
Sharing a single computer with family members or coworkers is common, but it usually comes with a major privacy concern: you do not want everyone else reading your personal files.
By default, Windows computers use the exact same file system and folder structure for every user who logs onto that machine. If you keep your personal files in public folders like the C: Drive root, anyone can open them.
If you save your files in your dedicated “Users” folder (like Documents or Pictures), you are generally protected from standard users. However, if another user on that computer has Local Administrator rights, they can completely bypass those basic protections and snoop through your profile.

If you want to create a hyper-secure folder that completely locks out everyone, including the other Administrators you have to modify the advanced NTFS security permissions.
How Default Windows Permissions Work
1. Understand Profile Folders
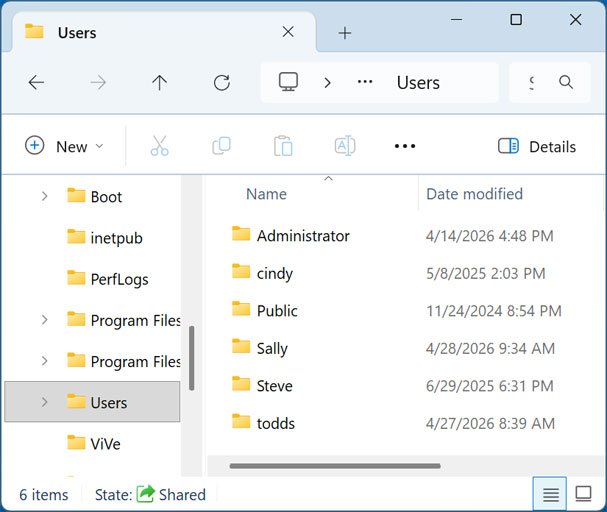
When multiple users log into a Windows 10 or Windows 11 computer for the first time, the operating system creates dedicated profile folders for them based on their username. In our example below, you can see that “Administrator,” “Steve,” and “Cindy” all have profile folders sitting inside the main Users directory. This structure keeps basic files separated.
2. Standard User Restrictions
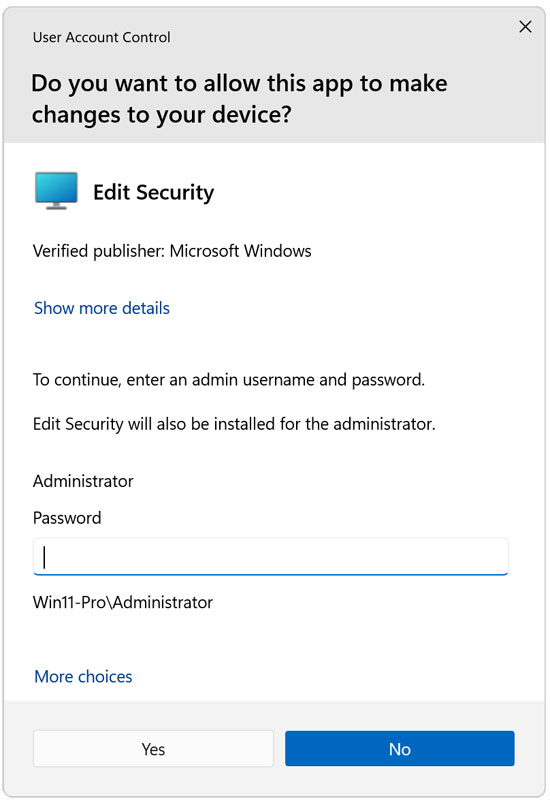
If a standard user (someone without admin privileges) tries to open another user’s personal folder, Windows will immediately block them with a permission error message. It will then throw a User Account Control (UAC) prompt asking them to type in an administrator password. If they don’t know it, they cannot get into those files.
Creating a Custom Locked Folder
So, what do you do if you want to lock down your files from someone who actually does have administrative credentials? You have to strip away their default inheritance rights. In our scenario, we have two users: Cindy and Steve. Cindy wants to create a highly secure folder on the root of the C: Drive called “Cindy’s Stuff.” She wants to ensure that Steve (who is a local admin) absolutely cannot open it.
1. Create the Target Folder
Create the new folder on your computer directly on the root of your C: Drive. Give it a highly recognizable name so you know exactly which directory holds your locked data. This is where you will store all your private files.
2. Open Folder Properties
Right-click the folder and choose Properties from the context menu. This action opens the main configuration window for this specific directory. You need administrative rights to view and modify these advanced settings.
3. Access the Security Tab
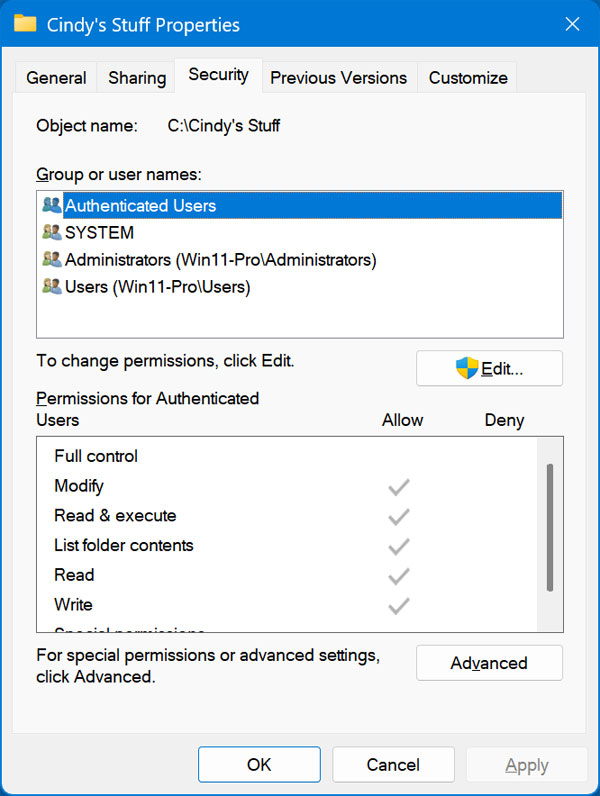
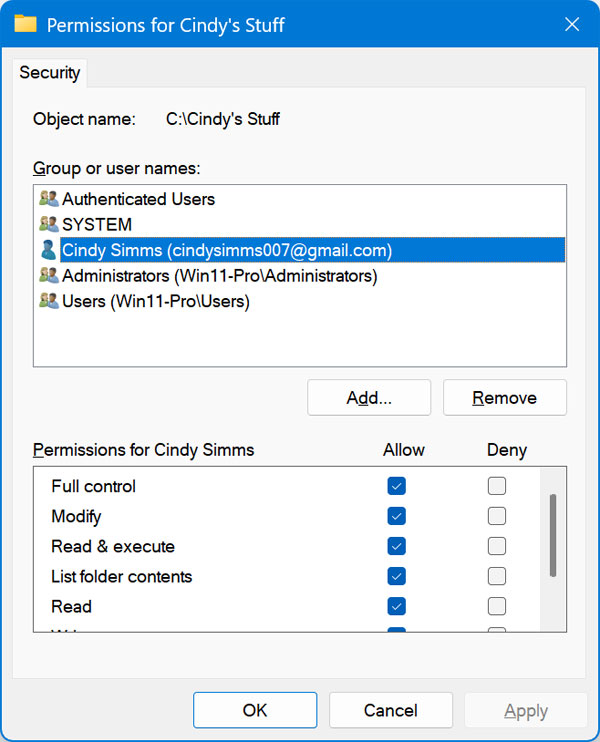
Click on the Security tab at the top of the properties window. Here you can see the default access permissions assigned by the operating system. The “Authenticated Users” group contains anyone who has logged in with a password. The “SYSTEM” account is used by Windows background services. The “Administrators” group contains anyone with admin rights like Steve, and the “Users” group contains standard accounts.
Granting Yourself Exclusive Control
Right now, everyone has access. We need to explicitly tell Windows that Cindy is the ultimate owner of this folder.
1. Open the Edit Menu
Click on the Edit button located near the middle of the security window. This opens a secondary dialogue box where you can actually change the user permissions. It requires an active administrator token to proceed.
2. Add Your Specific Username
Click the Add button to bring up the user search prompt. Type your exact username into the object name box and click OK. In our current scenario, you would type Cindy into this field.
3. Assign Full Control Rights
Click on your newly added username to highlight it in the list. In the permissions box below, check the box for Full control under the Allow column. Click OK to save this specific permission entry.
Breaking the Folder Inheritance
Now we want to remove everyone else’s permissions so only Cindy remains. You must stop the folder from copying the rules of its parent drive.
1. Attempt to Remove Users
Go back to the folder’s Properties window and click the Security tab. Click Edit, click on Authenticated Users to highlight it, and then click Remove.
2. Understand the Inheritance Error
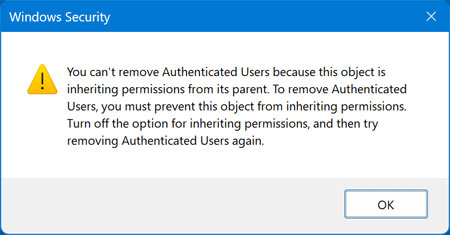
You will immediately get a warning message stating you cannot remove them because the object is inheriting permissions from its parent. Because this folder sits inside the C: Drive, it automatically copies all the security rules of the C: Drive. We have to sever that connection to lock the folder down.
3. Access Advanced Security Settings
To fix this error, close the warning boxes and go back to the main Security tab for the folder. Click the Advanced button near the bottom of the window. This opens the master security configuration console.
4. Disable Folder Inheritance
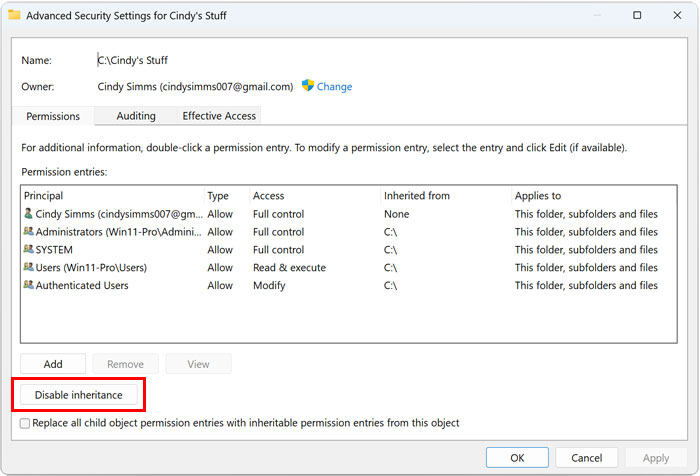
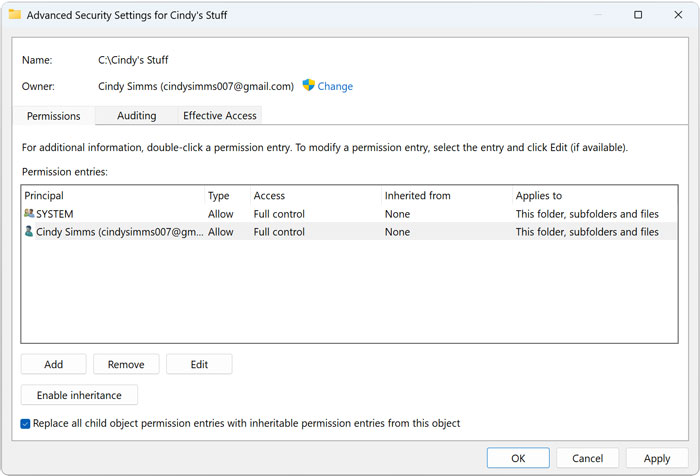
On the new Advanced Security Settings window, look near the bottom left corner. Click the button that says Disable inheritance. Windows will immediately prompt you with a critical choice regarding what to do with the existing rules.
5. Choose Your Inheritance Option
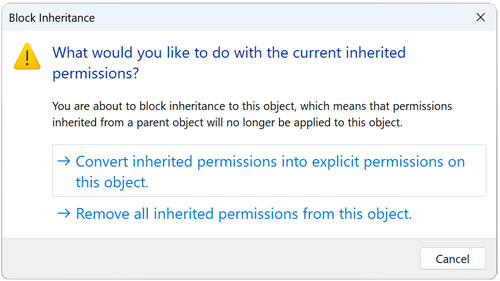
You can either convert the inherited permissions into explicit permissions or remove them entirely. Converting them safely keeps the current rules but allows you to delete them one by one. Removing them wipes the slate completely clean.
Removing the Unwanted Users
If you choose to remove all permissions, it will automatically delete everyone. This includes the critical SYSTEM user, which Microsoft does not recommend removing. The safer IT method is to choose the convert option.
1. Convert the Permissions
Click the Convert inherited permissions into explicit permissions option. You will be returned to the Advanced window with a fully editable list of users. The folder is now completely independent from the C: Drive rules.
2. Delete the Administrator Groups
You can manually click on the “Administrators” group, the “Users” group, and the “Authenticated Users” group. Click the Remove button for each one of these entries. Leave ONLY your specific user account and the SYSTEM account in the list.
3. Force Rules on Child Objects
Check the box at the very bottom that says Replace all child object permission entries with inheritable permission entries from this object. This ensures that any new files you drag into this folder will automatically be locked down by these new rules. Click OK and click Yes to confirm the final security warning.
Verifying the Security Configuration
1. Test Standard Access
Now, Cindy can confidently add her personal files to the new folder. Because we stripped away the Administrator group permissions, Steve is no longer allowed inside. The folder is completely isolated from the rest of the operating system.
2. Confirm the Access Denied Prompt
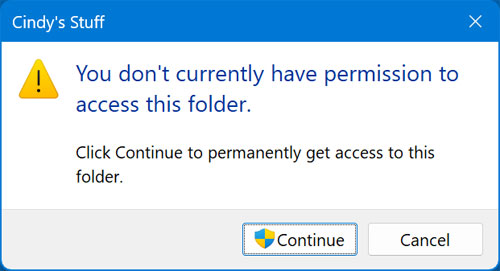
When Steve the local admin double-clicks the folder, he will be greeted with a warning. The prompt will read “You don’t currently have permission to access this folder” message. This proves the NTFS restrictions are working perfectly.
3. Block Administrator Override
Even if Steve clicks the “Continue” button with his administrator badge icon, he will fail to enter. He will be hit with a hard “Access Denied” message. This completely prevents him from opening the folder, viewing the file names, or copying the data.
Pro Technician Troubleshooting and FAQ
1. Can an Administrator bypass this folder security?
Yes. While this NTFS permission trick successfully stops casual snooping and blocks standard access, a knowledgeable IT technician who holds Local Administrator rights can bypass it. Because an Administrator has ultimate authority over the operating system, they can go into the Advanced Security settings and forcefully “Take Ownership” of the folder. This allows them to rewrite your rules and put themselves back on the access list.
2. How do I truly encrypt a folder so no one can read it?
If you want absolute military-grade security that even a skilled Administrator cannot bypass, you must use encryption. Windows 10 and 11 Pro and Enterprise editions include a built-in feature called EFS (Encrypting File System). Right-click your folder, go to Properties, click the Advanced button under the General tab, and check the box for “Encrypt contents to secure data.” This ties the folder cryptographically to your specific Windows login password. Even if an Administrator takes ownership of the folder, the files inside will be complete gibberish without your password.
3. What happens if I forget to leave the SYSTEM account on the permissions list?
If you aggressively delete every user from the folder except yourself, you might accidentally break your antivirus software or your automated backup routines. Background apps like Windows Defender run under the SYSTEM account. If SYSTEM is not allowed to read the folder, your files will not be scanned for viruses and may not be backed up to your external hard drive. Always leave SYSTEM on the access list.
For additional training resources, check out our online IT training courses.
Check out our extensive IT book series.